

Opening Thoughts
You won't believe it, but while researching wilderness survival techniques recently, I discovered many jaw-dropping survival tricks. Seriously, who would have thought that a bag of Doritos from a convenience store could save your life in a critical moment? Or that a roll of transparent tape commonly found in offices could have so many miraculous uses in the wilderness? These discoveries truly amazed me. With each tip I compiled, I couldn't help but marvel: these ordinary items from our daily lives can be incredibly useful in the wild! Today, let me open your eyes to these mind-blowing wilderness survival techniques.
Pre-Trip Preparation
When it comes to wilderness survival, it's not a spontaneous journey. Thorough preparation directly determines your survival chances in the wild. Last summer, when I went hiking with some friends, we almost fell into a "trap" - if we hadn't done our homework beforehand. Looking back now, it still makes me nervous, which is why I want to emphasize: pre-departure preparation is absolutely crucial!
First, you must share your detailed itinerary with family members or reliable friends. How detailed should it be? It should include your planned specific route, estimated arrival times at certain locations, and most importantly - when you expect to return. The logic is simple: if you encounter any unexpected situations in the wilderness (though we hope it doesn't happen), at least someone knows where to look for you, which could be life-saving information.
A special reminder: it's best to send your route map to at least two people, because if one person happens to be unavailable, there's still another person who knows your whereabouts. Also, remember to set a "warning time" - if they haven't heard from you by this time, they should alert authorities.
Speaking of preparation, plant knowledge is absolutely crucial. I suggest you research the plants you might encounter at your destination beforehand, especially those poisonous "bad guys." On this note, I must warn everyone about North America's three most common "poison kings": poison oak, poison sumac, and poison ivy. They might look ordinary, but once contacted, they can cause severe allergic reactions, making your body itchy and blistered - that discomfort is truly unbearable.
For hiking in China, you need to be especially careful of jimsonweed and pokeweed, which are highly toxic plants. Jimsonweed has beautiful flowers, but don't be deceived by its appearance. Some people want to pick it because it looks pretty, but this could lead to poisoning. Remember one principle: if you see an unfamiliar plant in the wild, it's better to walk around it than touch it.
I have a friend who got severe diarrhea and almost became dehydrated because they didn't know about plants and ate some wild berries. That's why I strongly recommend: rather than learning on the spot in the wilderness, do your homework beforehand. Now there are many plant identification apps for phones - you can download offline versions so they work even without internet.
Besides plant knowledge, basic understanding of terrain and landforms is also important. For instance, you need to know what areas are prone to landslides, which areas to avoid during rain, how to identify safe river crossing points, and so on. This knowledge might come in handy at any time.
Another crucial point: understand the local weather patterns. We often say "weather is unpredictable," and this couldn't be more true in the wilderness. So you must check the weather forecast for the next few days before departure, paying special attention to the possibility of extreme weather. If the forecast shows potential heavy rain or strong winds, it's better to reschedule.
Equipment List
When it comes to equipment, it's truly a significant topic. Did you know? An ordinary backpack, if packed properly, can really save your life in critical moments. Based on my experience from multiple wilderness activities, I've compiled a very practical equipment list.
First, let's talk about the backpack itself - it's best to choose waterproof material. If you can't get a waterproof one, you can waterproof it yourself. It's actually very simple - you can solve the problem with a few large garbage bags. Remember to bring extra garbage bags because they can serve not only as waterproof liners but also as emergency raincoats.
Drinking water is crucial, but how much should you bring? My suggestion is: bring twice the amount of water you expect to need for your planned journey. Why twice? Because situations in the wilderness can change instantly, and you might need to extend your trip unexpectedly. Besides, it's better to bring extra water back than die of thirst in the wilderness.
Regarding dry food, here's a tip: energy bars are a good choice - they're compact, lightweight, high in calories, and don't spoil easily. But don't just bring energy bars; it's better to combine them with some nuts and chocolate. This way you can maintain your energy while avoiding getting tired of one taste. Remember one thing: wilderness activities consume much more energy than usual, so make sure to bring enough food.
Flashlights are absolutely essential equipment. I suggest bringing two: one high-powered main flashlight and one compact backup. Bring several sets of batteries too, because in the wilderness, light is a vital survival resource. There are many solar-powered flashlights on the market now, which are also a good choice.
First aid kit is another focus, but many people don't know what to put in it. Let me summarize: you must have Band-Aids, gauze, bandages, antiseptic, pain medication, anti-diarrheal medicine, and antiallergic medication. If you have any special medical history, bring the corresponding medications. Remember: in the wilderness, small wounds can become big problems if not treated properly.
Multi-tools are truly wilderness survival magic tools. A good multi-tool knife can be used for cutting, repairing equipment, making tools, and so on. When choosing, pay attention to the material - stainless steel is best as it's durable.
Many people might not have heard of emergency blankets, but they're really important. They look like very thin aluminum foil but can maintain body temperature very well. Plus they're small and lightweight, completely worth bringing.
Whistles are essential for rescue. When choosing a whistle, note: the sound should be sharp, and plastic material is better as it won't rust. Some hiking backpack shoulder strap buckles come with built-in whistle function - this design is very thoughtful.
Portable water filters have now become standard equipment for outdoor sports enthusiasts. Although we'll bring enough water, having a water filter is always good just in case. There are many types of water filters on the market now, some can even be used as straws directly inserted into water bags, which is very convenient.
Besides this basic equipment, I want to specially remind everyone: bring some common tools, like rope, lighters, sunscreen, etc. These things might seem trivial normally, but they could become very useful in the wilderness.
Finally, don't forget to bring maps and a compass. Even if you bring GPS devices, these two most traditional navigation tools are still essential, because electronic devices might run out of battery or malfunction, but maps and compasses won't.
Survival Skills

Distress Signals
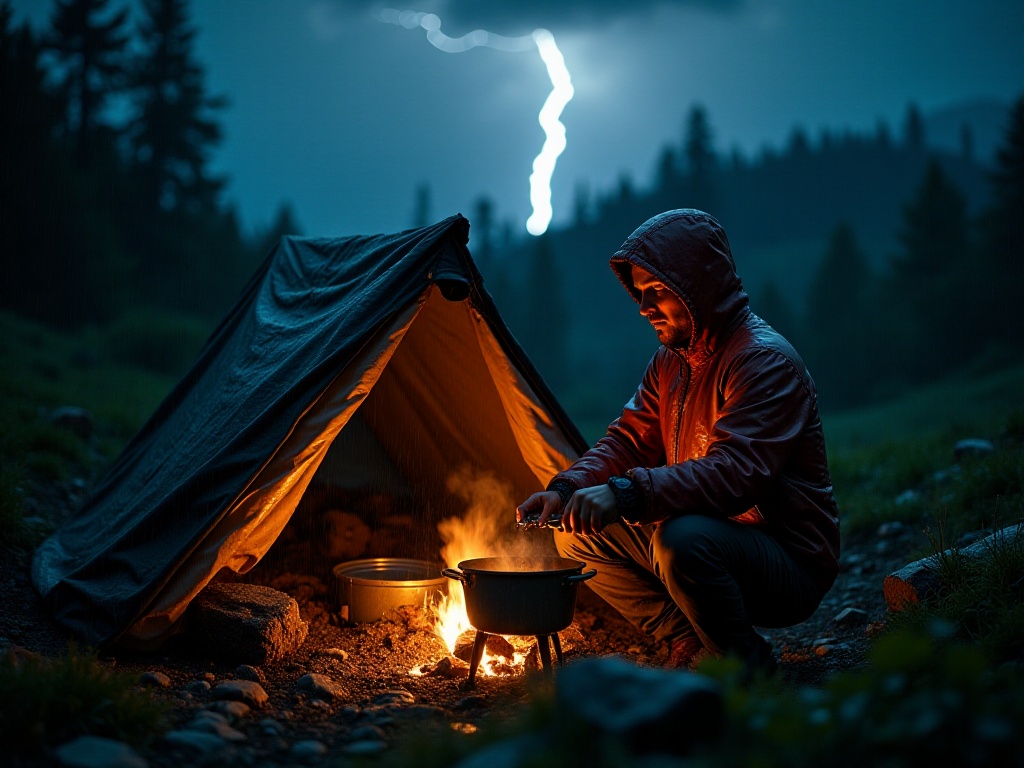
When you encounter danger in the wilderness and need rescue, knowing how to send effective distress signals becomes particularly important. Remember one crucial number: 3. Why 3? Because in internationally recognized distress signals, any signal in units of 3 represents a call for help.
Specifically, if you have a whistle (hopefully you've already included it in your essential list), blow three times, pause briefly, then blow three more times. Maintain this rhythm regularly so rescue personnel can determine this is a distress signal rather than animal calls or other natural sounds.
On sunny days, a mirror you carry can come in handy. Using mirror reflection for rescue is also a very effective method. How to do it? Point the mirror at the sun, then direct the reflected light spot at distant targets, making an "SOS" Morse code signal: three short flashes, three long flashes, then three short flashes again. This signal can travel far distances on sunny days.
Speaking of rescue, clothing color is also crucial. This is why I always suggest wearing bright colors for wilderness activities. Fluorescent yellow and fluorescent orange are colors easily spotted in natural environments. If you're wearing dark or camouflage clothing, carry a bright-colored jacket or fluorescent vest to put on in emergency situations.
For nighttime rescue, your flashlight is your best weapon. Still follow the "rule of three": send three consecutive light signals. You can point your flashlight at the sky and draw an "SOS" pattern. Many flashlights now come with built-in SOS flashing function - if yours has this feature, use that mode directly.
However, note that while sending distress signals, you also need to conserve flashlight battery power. After all, batteries aren't easy to replenish in the wilderness. So it's better to establish a distress signal schedule, like sending signals every half hour, which ensures rescue effectiveness while not overconsuming power.
Amazing Fire Starting Methods
When it comes to wilderness survival, fire starting can be said to be the most basic and important skill. But what if you don't have a lighter or matches? This is when you need to use some amazing fire starting methods.
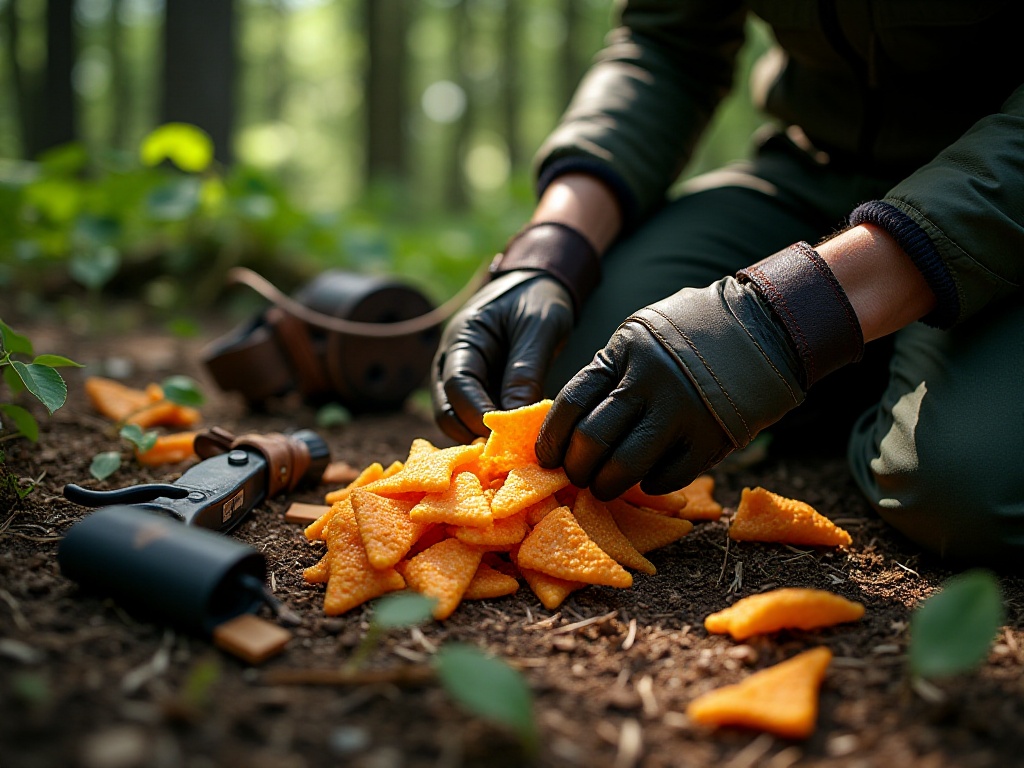
The most unexpected is using chips to start a fire. Yes, the kind of chips you usually eat, especially oil-fried chips like Doritos. Why can chips be used as tinder? Because chips absorb a lot of oil during production, and their structure is very loose - these two characteristics make them especially easy to burn.
The method of using chips to start a fire is simple: crush the chips into small pieces, pile them into a small heap, then ignite them with a fire steel or other methods. Although chips don't burn for long, they burn long enough to ignite other combustible materials. Of course, this method should only be considered emergency measure, not a long-term solution. After all, who would specifically bring many bags of chips for camping?
Another unexpected fire starter is steel wool. If you have a battery (preferably a 9V square battery), you can start a fire with steel wool. The specific operation is: spread out the steel wool, make it fluffy, then touch both positive and negative terminals of the battery to the steel wool simultaneously. Due to steel wool's high resistance, current passing through it will generate high temperature, and you'll quickly see sparks.
I've tried this method when camping before, and the effect was really amazing. However, note that steel wool also burns for a very short time, so prepare flammable materials (like dry bark, dry grass, etc.) in advance and put them on as soon as the steel wool ignites.
If you have a magnifying glass or glasses, you can also use sunlight to start fires on sunny days. This method might be old-fashioned, but it really works. The key is finding the right angle to concentrate sunlight into a small light spot aimed at flammable material.
Speaking of flammable materials, we actually have many things around us that can be used to start fires. For example, toilet paper and tissues - roll them into loose balls and they're very easy to ignite. If you brought alcohol pads (the medical kind), that's even better - they're excellent fire starters themselves.
Another trick is using gum wrapper (the kind with aluminum foil) and battery to start a fire. Cut the gum wrapper into thin strips, connect one end to the battery's positive terminal and one end to the negative terminal, and the middle part will ignite due to current-generated heat. This method is easier to control than using steel wool, and gum wrappers are usually cleaner.
Water Source Acquisition
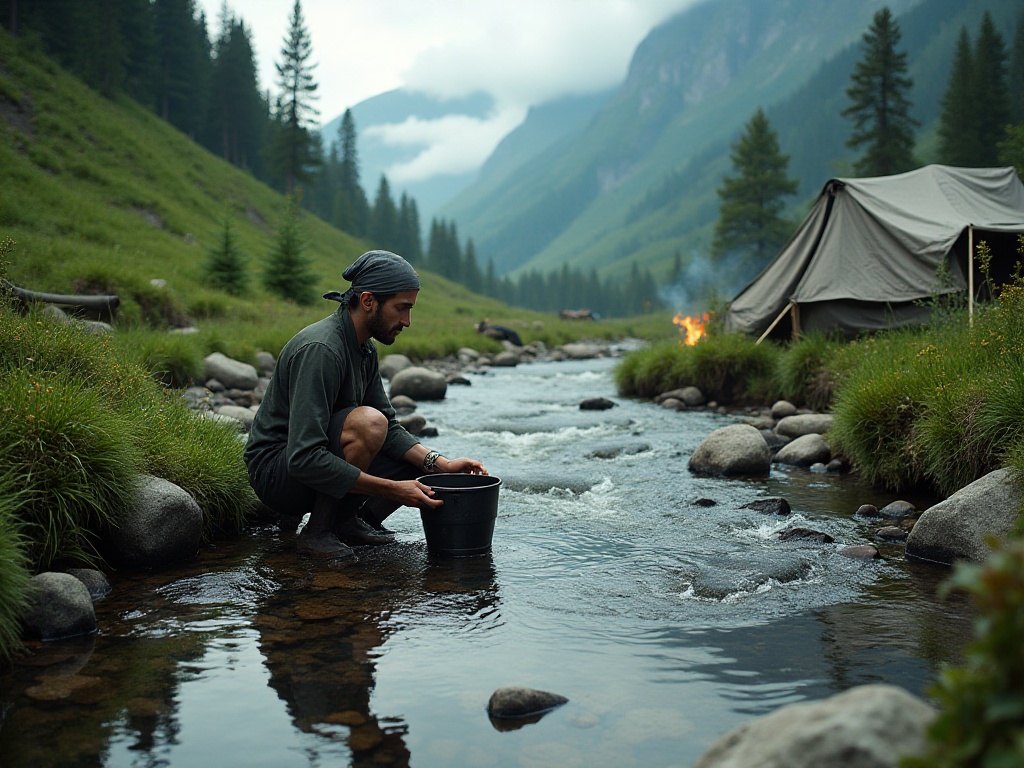
In the wilderness, finding safe drinking water sources might be the most important survival skill. Remember one basic principle: running water is safer than standing water. What is running water? It's flowing water, like streams and rivers. Standing water refers to stationary water bodies like puddles and ponds.
Why choose running water? Because flowing water is less likely to breed bacteria, and usually has higher oxygen content, making the water quality relatively better. However, note that even stream water that looks crystal clear should be treated before drinking. Because you never know what's upstream - there could be animal waste or other pollution sources.
If you really can't find running water sources, then you need to find ways to get water in other forms. For example, morning dew is a good choice. You can use a clean cloth or T-shirt to wipe dew from plant leaves, then wring it into a container. Although this method doesn't collect much water, it can quench thirst in emergency situations.
Many people might have heard about using sanitary pads to filter water. Indeed, the material of sanitary pads has good filtering properties and can filter out large particle impurities from water. But here's a special reminder: this method can only filter out visible impurities - it has no effect on bacteria, viruses, and chemical pollutants.
If you must use sanitary pads to filter water, remember these steps: first spread out the sanitary pad, make it as fluffy as possible - this will improve filtering effect. Then place it at the container opening and slowly pour water through it. The filtered water must be boiled, preferably for 3-5 minutes of continuous boiling, to kill harmful microorganisms.
On rainy days, rainwater is a good water source. But note, don't drink rainwater directly, as air pollutants might fall with the rain. The correct method is: wait until it has rained for a while before collecting - this rainwater is relatively cleaner. You can collect rainwater using tents or tarps, just tie a container at the lowest point.
If you have plastic bags or plastic sheets, you can also collect water using plant transpiration. The specific method is: choose a bushy shrub, cover branches with a plastic bag, making sure to tie the bag opening tightly. During daytime sun exposure, water vapor from plant leaves will condense on the plastic bag's inner wall and flow to the bottom. Although this method doesn't collect much water, the water quality is relatively clean.
Another important technique for finding water sources in the wilderness is observing animal activity. For example, if you notice birds frequently flying in a certain direction, there's likely a water source there. Bees usually don't travel more than 3-4 kilometers from water sources. So if you see bees, it means there might be water nearby.
Equipment Tips
Tape Techniques
Speaking of wilderness survival essentials, tape is definitely one of the most magical items. It can not only repair tents and prevent blisters, but also serve as a tool for fixing fractures in emergencies. I bring a roll of tape every time I go out because it's just so useful.
Let's start with the most basic uses: repairing equipment. Tent has a small hole? Tape can temporarily seal it. Backpack strap broke? A few wraps of tape can handle it. Shoe sole coming off? Tape can save the day. These are all situations I've personally experienced, and tape perfectly solved the problem every time.
Preventing blisters is another important use of tape. Many people might not know that applying tape to areas prone to friction beforehand can effectively prevent blisters. This method is especially useful when breaking in new shoes. Of course, it's best to use medical tape as it's less irritating to skin.
If unfortunately a fracture occurs, tape combined with some hard objects (like branches) can make a simple splint. This temporary treatment can prevent the injury from worsening until professional medical help is available. However, note that when fixing, don't wrap too tightly - leave some room for movement to avoid affecting blood circulation.
To save space, I usually don't bring the entire roll of tape, but instead wrap it around my water bottle or trekking poles. This not only saves space but also makes it accessible anytime. I suggest leaving a small folded corner every few wraps when wrapping tape, making it easier to find the end when needed.
Tape has another little-known use: it can be used to start fires. Crumple tape into a ball and it will burn when exposed to fire. Especially fabric-based tape burns relatively longer and can serve as good tinder.
If clothes tear in the wilderness, tape can also temporarily serve as a patch. Although not a long-term solution, being able to quickly block wind gaps is important in cold environments.

Innovative Applications
In the wilderness, you often need to improvise and solve problems creatively. For example, a belt, besides holding up pants, can become a sturdy rope. Just add more holes to the belt, and it can be used as a rope for tying items or as a rescue rope in emergencies.
Many people might not know that discarded beverage cans are actually treasures. Cut open a can, flatten it, punch several small holes in the middle, and you can make a simple alcohol stove. Although this homemade stove isn't highly efficient, it can still be used to boil water or cook food in emergencies.
If your compass breaks or gets lost, don't worry too much. With just a leaf and a needle, you can make a temporary compass. The specific method is: magnetize the needle (can be done by repeatedly rubbing it with hair), then place it on the leaf, and put the leaf on water. Once the leaf stabilizes, one end of the needle will point north. Although this method isn't very precise, it can help you determine direction in emergencies.
Phone dead? Don't panic - if you have two different-sized batteries, you can generate some voltage. This method can be used to emergency charge your phone a bit - although not much, it's enough to
Related articles
-

Essential Wilderness Survival: From Novice to Expert in One Article - Master Outdoor Safety Skills
2024-12-27
-
Beginner's Guide to Wilderness Survival: An Emergency Survival Guide Anyone Can Master
2025-01-16
-
Essential Wilderness Survival Skills! Can You Save Yourself with Disposable Hygiene Products and Chips? I've Compiled These Amazing Survival Tips
2025-02-01
-

Survival Skills You Really Should Know: A Step-by-Step Guide to Becoming a Survival Expert
2025-02-13